
HyperServer ISAPI Module Mode
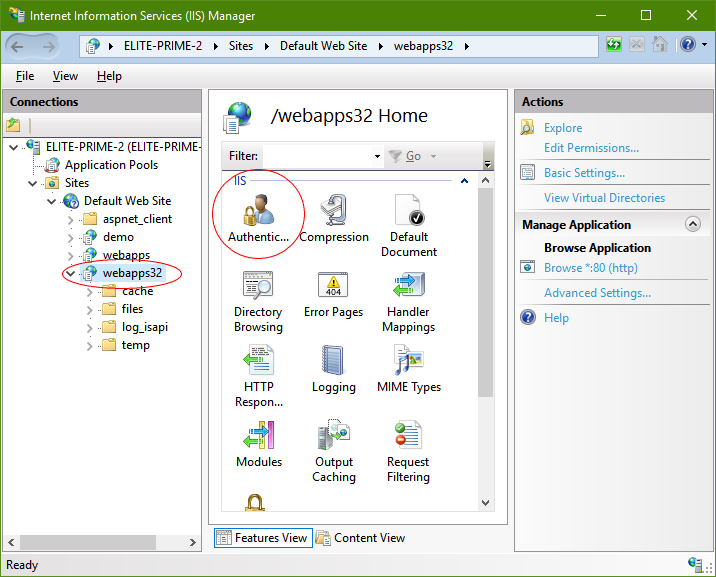
ISAPI Module is one of the preferred deployment methods for production servers. Configuration of HyperServer in this mode is very similar to Standalone Server mode. In addition to those steps you need to set up IIS and create an Application Pool and an Application Folder. Setting up IIS for HyperServer is similar to the steps described under ISAPI Module, but there are a few differences.
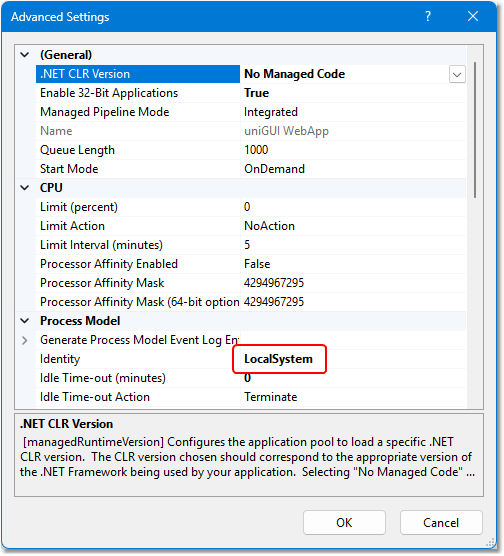
The standard IUSR built-in account doesn't grant enough privileges to HyperServer applications, so you need to change it to LocalSystem or another account with extensive privileges (such as LocalService or a custom account with administrative privileges). If you are setting up an existing Pool and want to convert it to HyperServer you need to change the Windows account used for that ISAPI Pool. If you are creating a new Pool then make sure you set its Identity to LocalSystem when creating it.
Important: Modify the web application's Authentication settings. This step is especially important if you have chosen named pipes as the transport type.
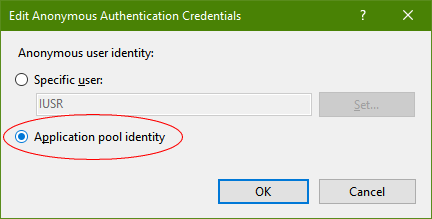
Make Application pool identity the active option:
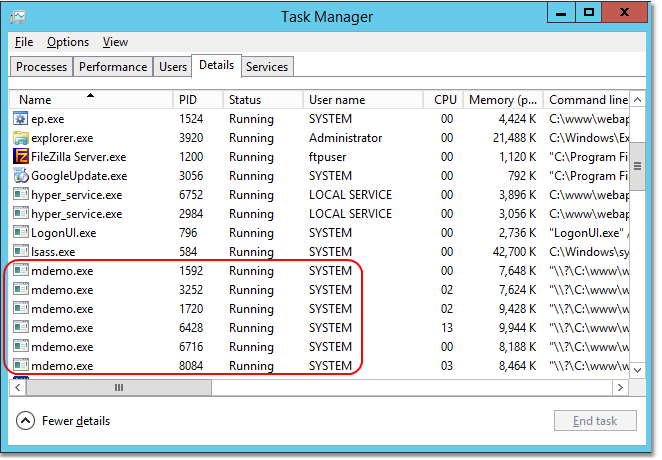
After changing pool identities you should verify that your Nodes are running under the correct user account. This can be done by opening Windows Task Manager. After running your web application, locate your Node executable processes and check the username to confirm they run under the intended account. In the image below all Nodes are running under the SYSTEM account, which shows that HyperServer ISAPI application was configured correctly.
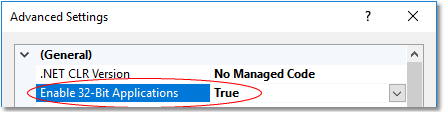
If your OS is 64-bit and you plan to use 32-bit HyperServer binaries then make sure your pool supports 32-bit DLLs:
After configuring the pool you can continue with setting up HyperServer. Copy the file hyper_server.dll to your application folder. This file can be found under ..\uniGUI\HyperServer\bin\.

Now you need to rename hyper_server.dll to any desired name — preferably the same name as your existing module. Indeed hyper_server.dll will replace your application DLL and your own application should be recompiled in Standalone Server mode.
Consider the following example to convert an existing uniGUI ISAPI module named myapp.dll to a HyperServer application.
In the HyperServer application model your own applications are always deployed in Standalone Server mode. HyperServer itself takes care of other deployment methods such as Windows Service and ISAPI Module. This simplifies development: you create and test your applications only in EXE format.
Another IIS setting that may affect HyperServer is the Shutdown Time Limit parameter:
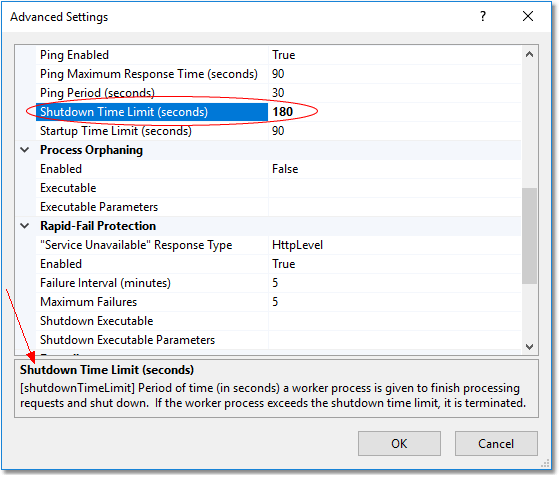
This parameter determines how long IIS will wait for the ISAPI DLL to terminate. HyperServer DLL normally terminates when you recycle or stop the application pool, but termination may take longer because HyperServer must terminate all of its Nodes first. The default value is 90 seconds, but you may need to increase it to 180 seconds. Change this value only if the default 90 seconds is not enough for your particular application (for example, when there are many Nodes).
Atualizado