
Commercial Edition (C++ Builder)
Installation instructions for uniGUI (C++ Builder)
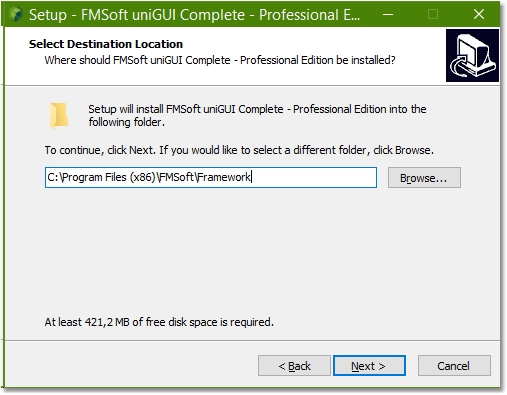
Download uniGUI Setup
Please download the latest uniGUI Setup from the customer portal.
You will notice that there are two Setup versions:
FMSoft_uniGUI_{Edition_0.XX.0.YYYY}.exe This is the one which will be installed on developer PC for development purpose.
FMSoft_uniGUI_{Edition_runtime_0.XX.0.YYYY}.exe This one is only for deployment and will be installed on server computer hosting your uniGUI apps.

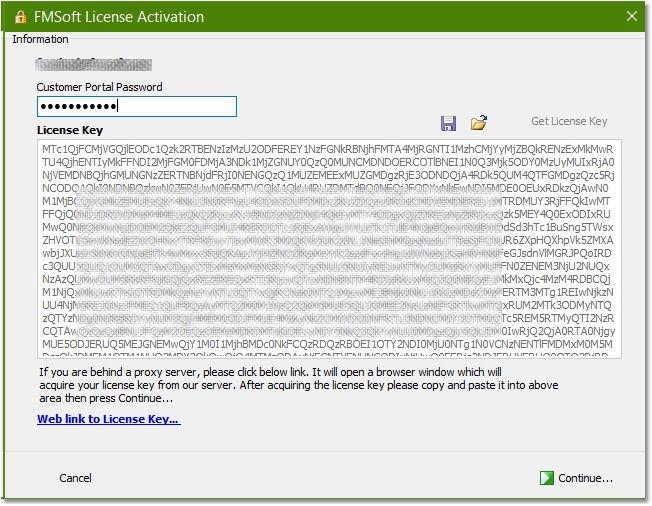
Obtain license key
Starting from version 0.99.95 the license keys are directly obtained from an activation server. You can get your license key by entering your password and pressing the Get License Key button. This will fill the License Key area with an appropriate key. Alternatively you can click the blue link "Web link to license key..." which will open a browser page containing your key. You can paste the key in the License Key area.
After the key is acquired, press Continue and proceed to the next step.
It is also possible to save your acquired license key in a local file and use it the next time you re-install the same edition and version of uniGUI.


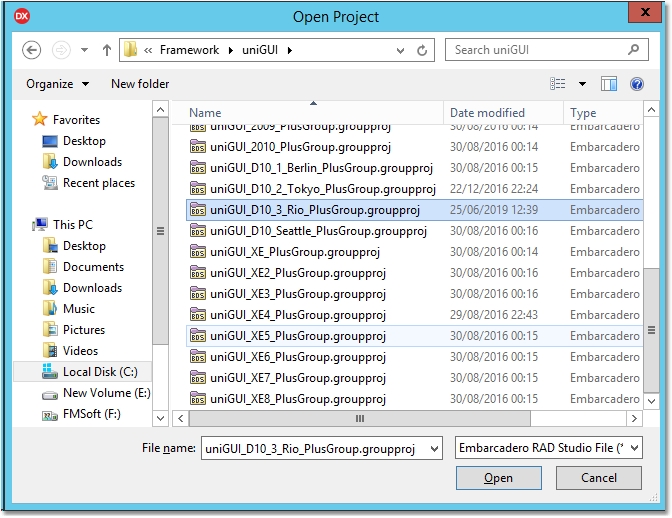
Prepare and build packages
In the project group there are several Delphi packages. Before building these packages you may need to change package configuration:
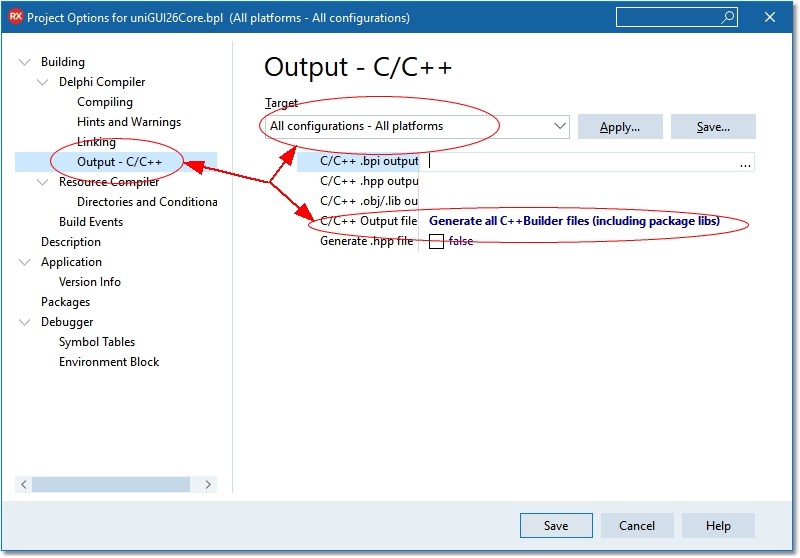
Note: Starting with uniGUI version 1.90.0.1537 all packages are modified to generate all C++ related files by default. If you are installing version 1.90.0.1537 or later you can skip the Generate all C++Builder Files step.
For all uniGUI packages go to Options -> Linker and set "Generate all C++Builder Files".
(If your Delphi version supports more than one platform make sure to set the Target to All configurations - All platforms)
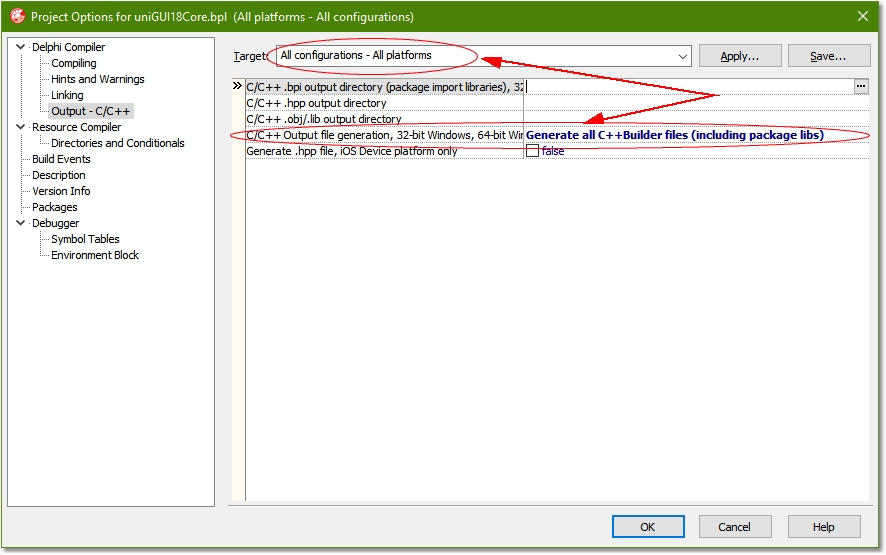
The configuration screen may change between Delphi versions. Example for Delphi 10.3.2:
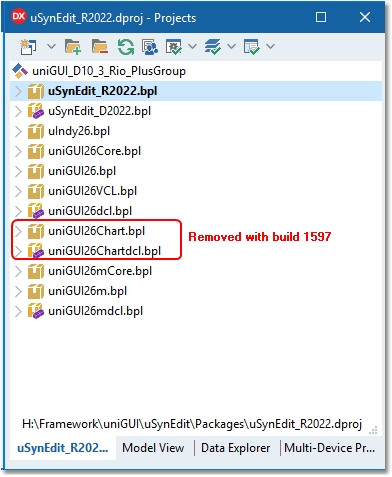
Build all packages in Project Manager starting from SynEdit_Rxxxx.bpl.
Important: Do not select Clean All or Clean commands for any of the uniGUI packages. This will delete pre-compiled DCU files from the DCU folder and you will have to install uniGUI again.
Additional steps for C++ Builder (Win64 Platform):
If you plan to compile C++ Builder projects for Win64 platform, you must repeat this step for uniGUI Runtime Packages only for 64-bit Windows Platform as well.
List of uniGUI Runtime Packages that should be built for C++ Builder Win64 platform only:
uniToolsXX
uIndyXX
uniGUIXXCore
uniGUIXX
uniGUIXXChart (Starting from build 1597 this package is no longer available)
uniGUIXXmCore
uniGUIXXm
For each of the above packages in Project Manager, change the selected platform to Win64 and Build the package to generate required HPP and other C++ specific files for Win64 platform.
Note: the above steps are only needed for Win64 platform and C++ Builder.
You can run IDE Build All command for the whole project group.
Install design-time packages
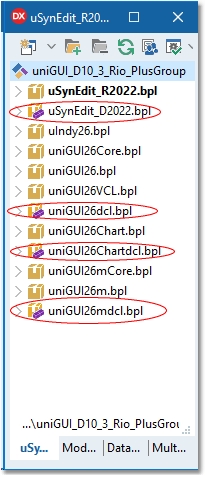
After building all packages, install the design-time packages by right-clicking each package and selecting Install in the following order:
SynEdit_D20xx.bpl
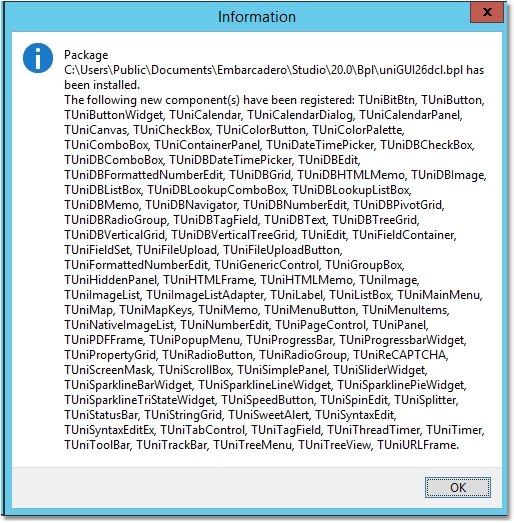
uniGUIxxdcl.bpl
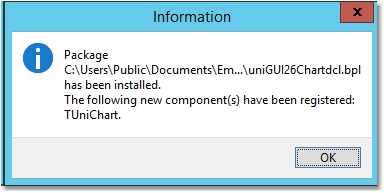
uniGUIxxChartdcl.bpl (Starting from build 1597 this package is no longer available)
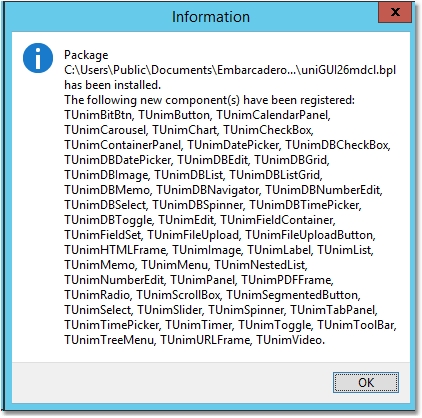
uniGUIxxmdcl.bpl (Plus/Complete Editions only)
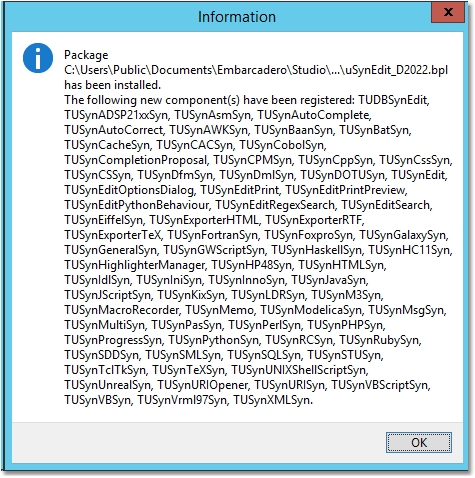
Several new components will be installed:
Now the installation is completed. You can proceed to running demos or creating new uniGUI projects.